Quickly Booked App Support
We’ve paid special attention to making configuring Quickly Booked App a breeze for our users. You can access all general settings, features, and customization options immediately when you log in. To help you set up everything, we’ve divided the settings into global and appointment settings. Global settings are all about customizing Quickly Booked App to fit you perfectly and you can set up time format, time zones, date format, etc.
Appointment settings allow you to set up all the necessary appointment details to make booking management as easy as it gets. You can choose whether you want to manually approve appointments, default time slot, and time limitations.
Additionally, you can also configure:
- Company settings (you’ve already filled most of these fields during the signup process)
- Office hours
- Company days off
- Services
- Employees
- Locations
- Schedule
- Email Notifications
- SMS Notifications
- Payment Settings
- Users and Roles
- Time Zones
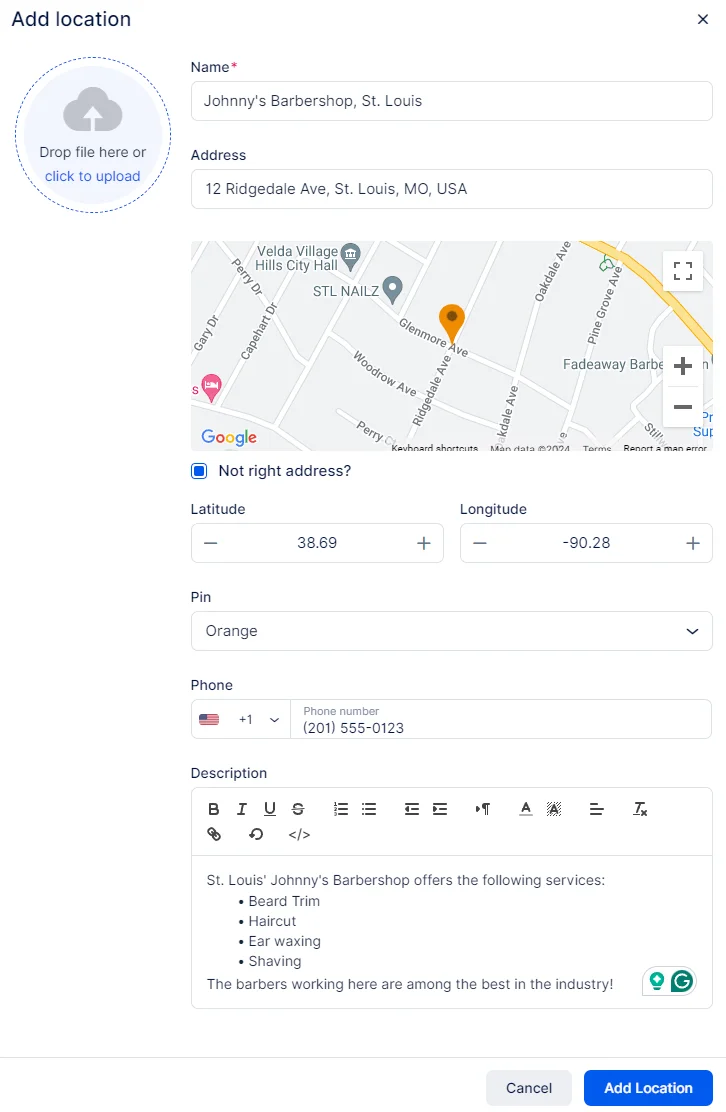
Once the location has been added, a “Success” prompt will be displayed, and you’ll have the option to simply close it, or to access additional settings of the location by clicking the “Go to Location” button.
If you use this button, Quickly Booked App will take you to the detailed overview of the location where you’ll be able to see and modify the information you entered when you added the location, but you’ll also see two tabs on the left:
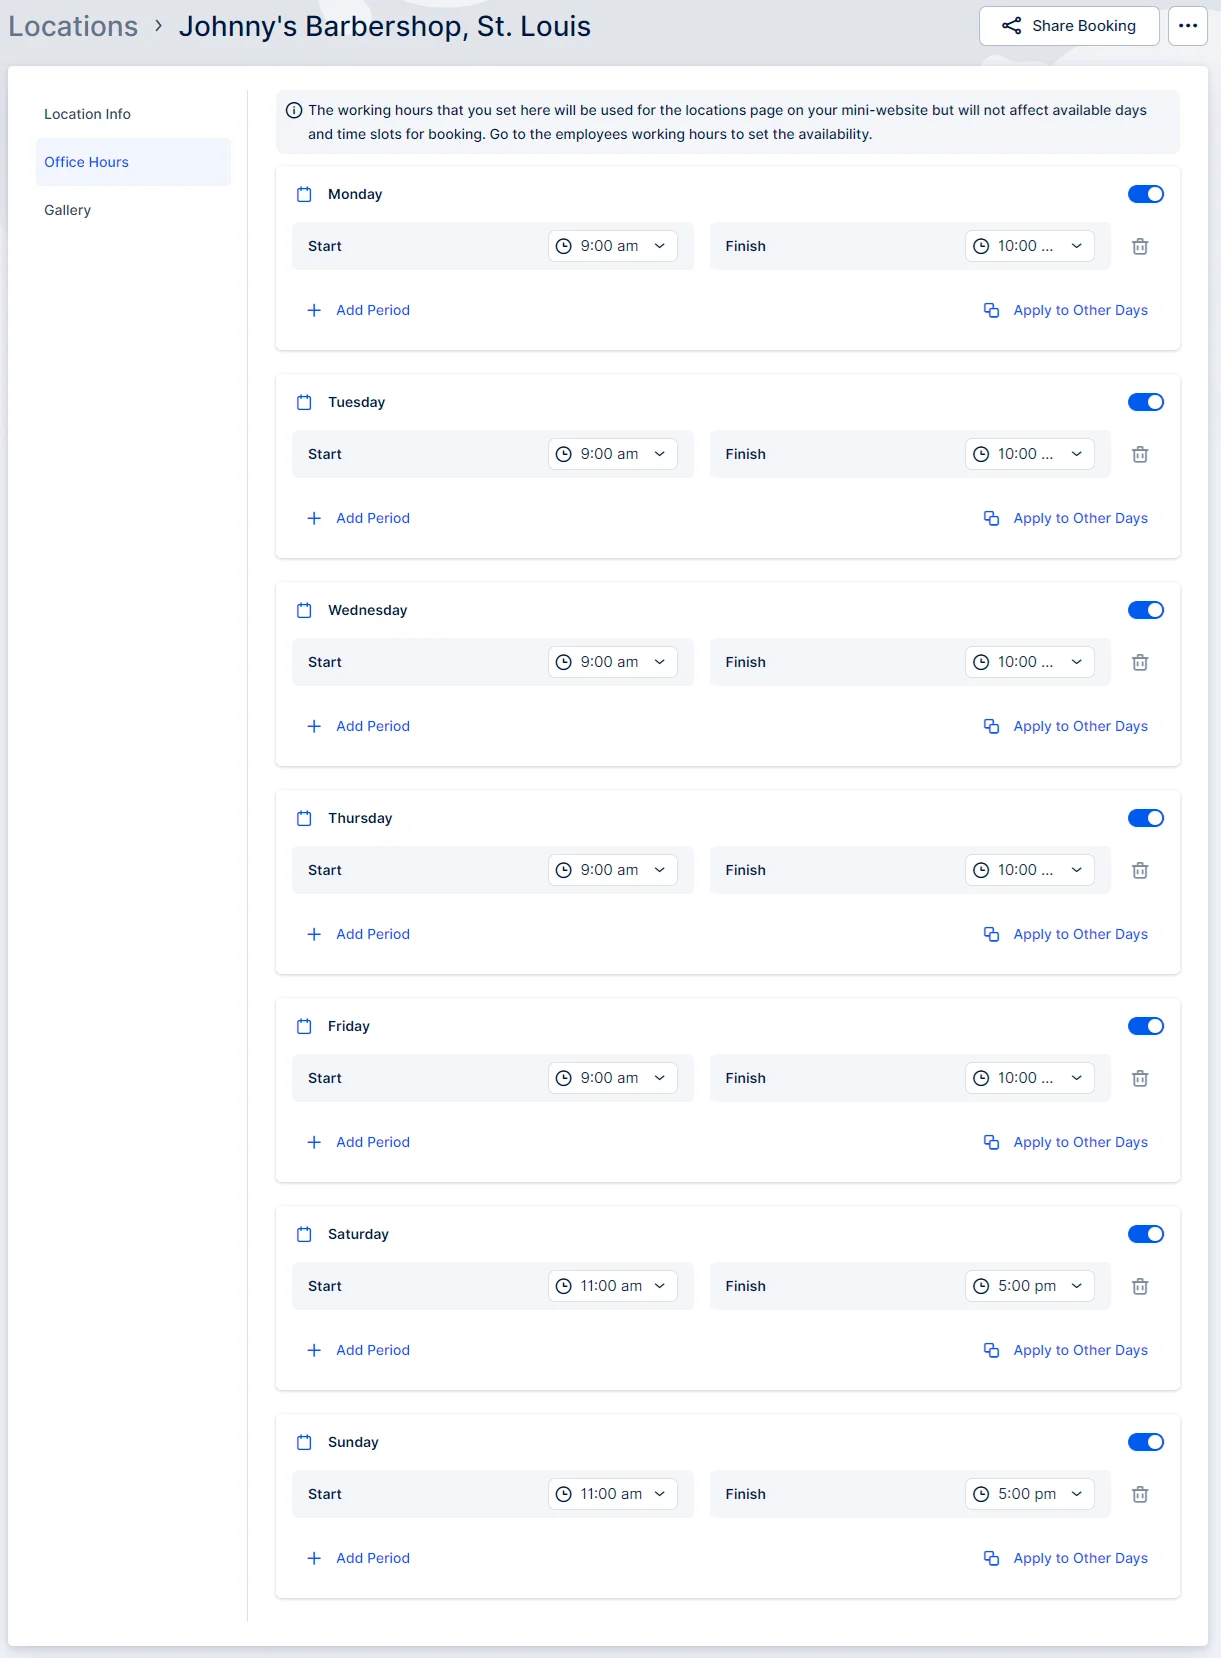
- Office Hours
- Gallery
The Office Hours tab enables you to set the location’s operating hours, which will be displayed on the location’s page of your mini-website. These working hours are designed to showcase when the location is open but do not directly affect the availability of services.
To configure the availability of services, you will need to edit the Employee’s Working Hours. This allows you to define which location(s) the employee will cover during their working hours. By aligning employee schedules with specific locations, you ensure that services are available and bookable at the correct times and places.
The Gallery tab allows you to enhance the location’s profile by adding a gallery of images related to the location. These images will be showcased to customers during their booking process once they select the location.
To add images to the gallery:
- Click on the field for uploading photos.
- Upload images from your files to create an engaging visual representation of the location.
Once you have finished entering all location details, remember to click the “Save Changes” button that pops up at the bottom of the screen. This ensures that the location information is saved and displayed correctly on the page for customers to view and select.
Please Note:
- In order for the locations to appear during the booking process, you need to connect them with employees in the Employee’s Info and Working Hours tabs.
- Choose the default location for each employee. Additionally, select the specific locations for each working period to create unique schedules.Your employees can work in different locations, so Quickly Booked App provides the flexibility to assign different locations for different working periods.
- Your employees can work in different locations, so Quickly Booked App provides the flexibility to assign different locations for different working periods.
Working with the Locations list
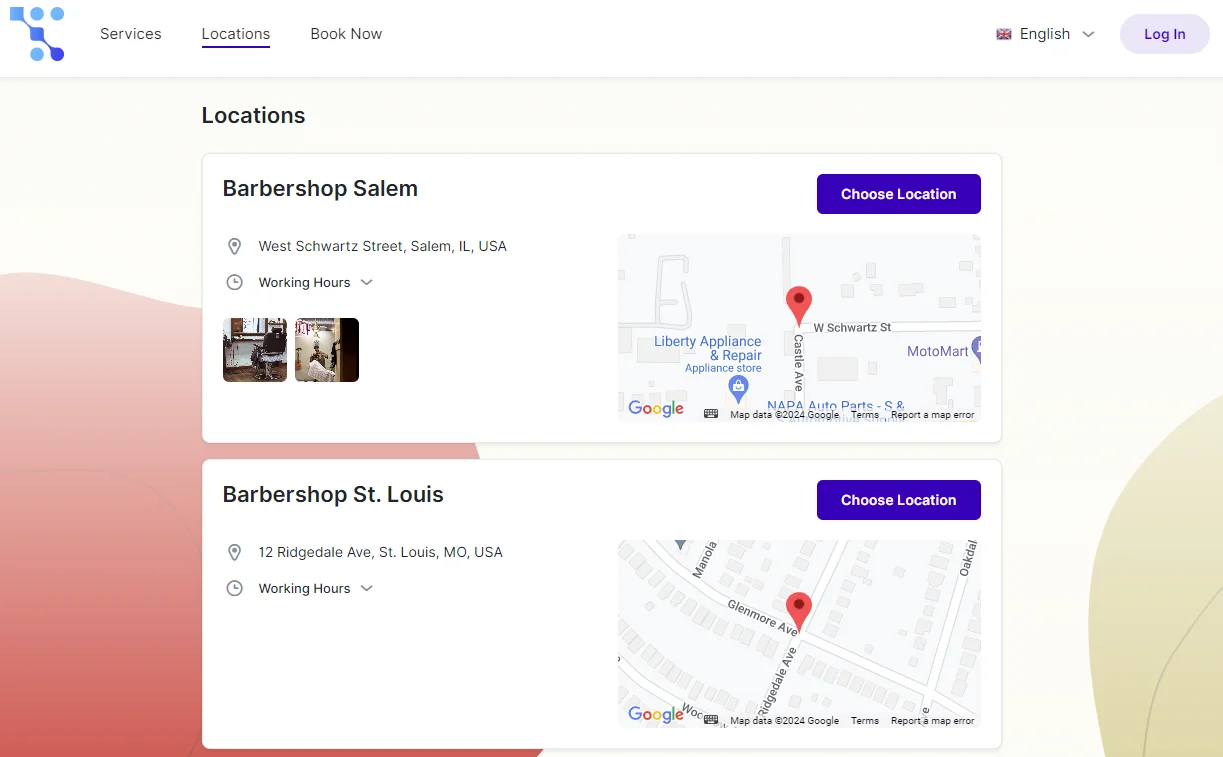
All Locations are listed on the Locations page, displaying basic information such as the location name, address, and phone number. Clicking on a specific location will open a sidebar with more detailed information.Sidebar Details:
- Office Hours: View the operating hours of the location.
- Address: The address is displayed on a map for easy reference.
- Gallery: If created, a gallery of images related to the location.
To edit a location, simply click on the “Edit” button at the top of the right-hand side menu.
If you have a long list of locations, you can search for a specific location by entering its name.
Each location has a three-dots (…) menu on the right of the page, allowing you to:
- Edit: Make changes to the location details.
- Delete: Remove the location from the list.
Note:
If you attempt to delete a location that has past or future appointments connected to it, a warning will be displayed to prevent accidental deletion.
If you choose to delete a location with booked appointments, all future and past appointments associated with that location will also be deleted.
This action is irreversible and cannot be undone.
On your Booking Website, customers will find the “Locations” tab at the top. When they click on it, they will be able to view all physical locations (online locations will not be displayed):