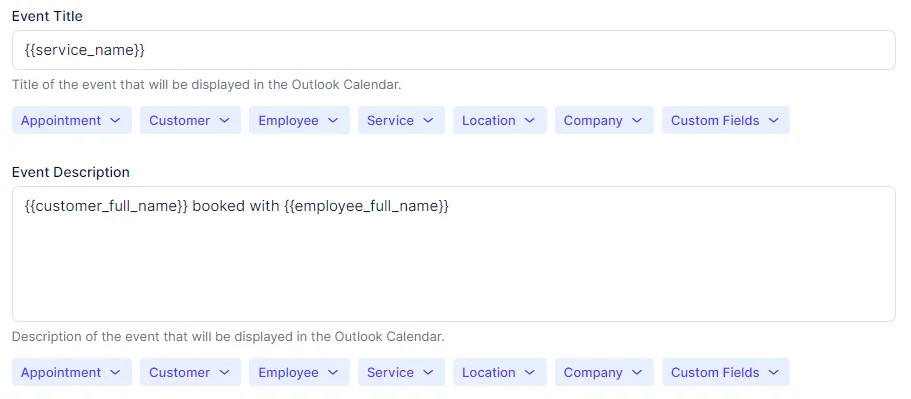
Quickly Booked App Support
Locations within Quickly Booked App are designed for businesses that operate in multiple places. The ability to manage multiple locations is a custom feature in our application and will be activated by default during your trial period.
However, if your business operates from a single location or is entirely online, there’s no need to worry. You can still use Quickly Booked App without configuring any additional locations. Simply enter your company’s main location in the Company Settings section. For example, if you offer services exclusively through Zoom, you can designate “Zoom” as your location.
For those businesses that do require multiple locations, this article will guide you through the process of creating and managing them within the Quickly Booked App booking software.
The Multiple Locations feature for Quickly Booked App is considered a premium feature, and it will be counted towards your total number of Custom Features & Integrations.
Video Version
To begin creating your locations, first, ensure that the “Multiple Locations” feature is activated on the Features & Integrations page.
When you access this page, you’ll know the feature is active if you see the “Disable” option displayed on its card. Conversely, if the feature is not yet activated, it will not appear in the left-side menu. Once confirmed, click on the “Locations” option to start creating your locations.
Creating Locations
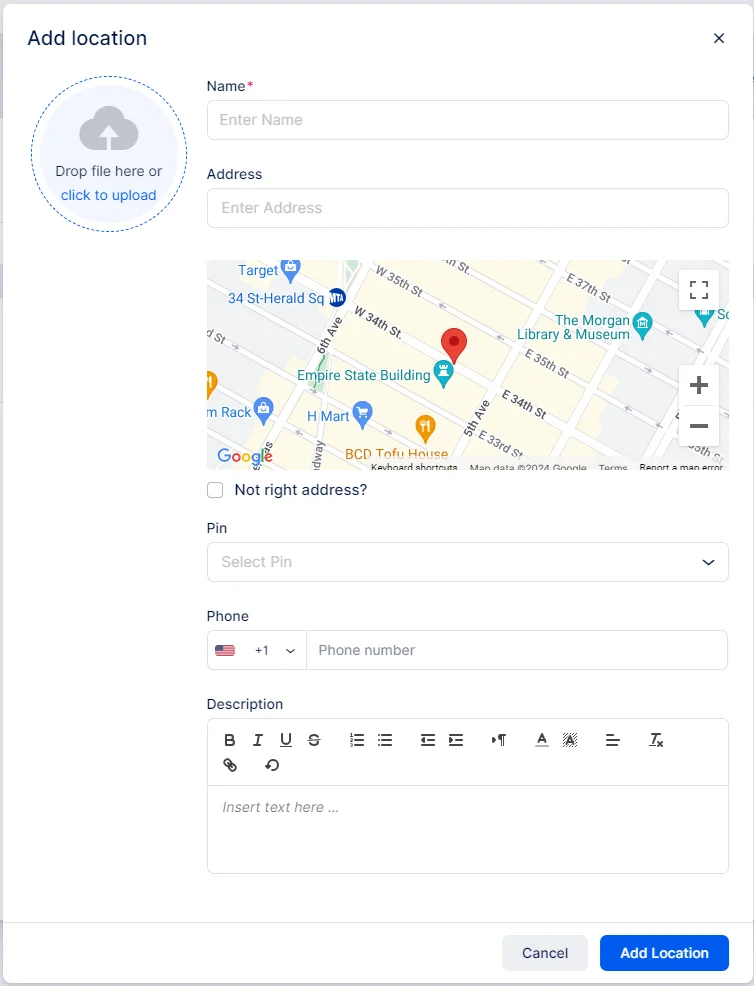
Upon accessing the “Locations” section, click on the “+ Add Location” button to bring up a new popup where you’ll define the details of the location:
- Location Photo: Upload the main location photo to be displayed on the Locations page in the admin dashboard and on the Booking form. Click anywhere in the circle to choose a photo from your files and upload it, or simply drag and drop the photo into the area.
- Name: This is the only mandatory field that cannot be skipped.
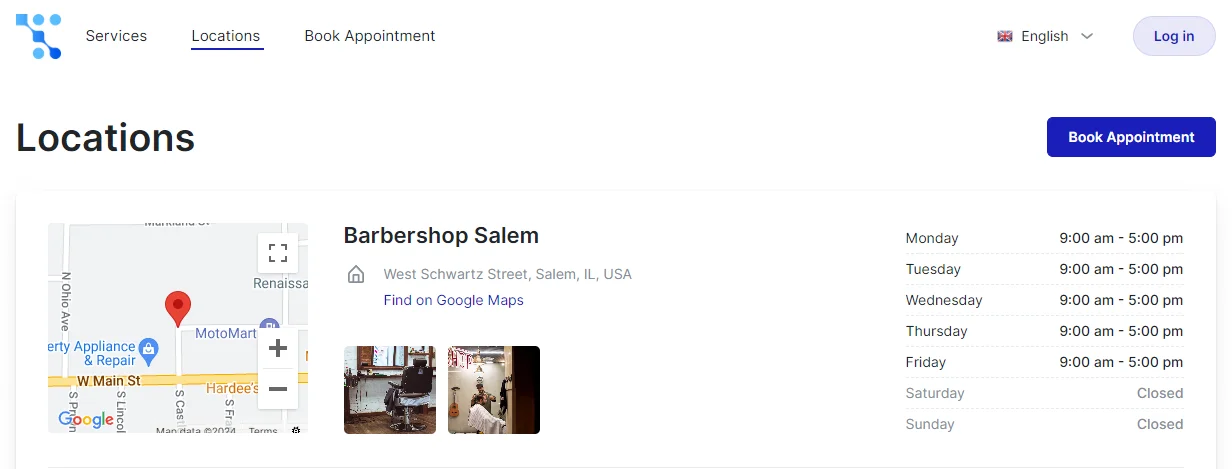
- Address: Enter the location’s address, which will be searched on Google Maps to set the exact pin. The map will later be displayed as part of your Booking website on the Locations page. If you create several locations, all of them will be shown on a separate page for customers to view.
- “Not the right address?” – If Google Maps cannot find the address entered above, check this option. Two new fields will appear to enter Latitude and Longitude manually.
- Pin: Select one of the four pins provided to customize the view on the Booking website’s map.
- Phone: Add a phone number for the location. This allows you to display different phone numbers for each location on your Booking website.
- Description: Write a description to provide additional information to your customers. This description will be shown on the booking form when customers select the location.
Online Locations (Zoom, Google Meet, Microsoft Teams): These are added automatically once you enable these integrations, and there’s no need to configure them in the Locations section. Quickly Booked App will recognize these as online meeting options.
Other Online Meeting Tools: If you’re using online meeting tools not directly supported by Quickly Booked App , and you have static meeting URLs from these tools, you can create a location called “Online” and paste the meeting URL directly into the body of your email notification templates. This allows customers to join online meetings directly from their appointment confirmation emails. Please note that this location would be considered as an “On-Site” location by Quickly Booked App , so when configuring the service, make sure not to select the “Online” option in the “Where do you want to provide the service” section. As mentioned above, only directly integrated meeting tools are recognized as “Online” locations.
Phone Call Services: For services conducted over phone calls, you can create a dummy location named “Phone Call” without an address. This way, customers booking appointments on your website will have the option to choose “Phone Call” as a location, providing flexibility for your services.
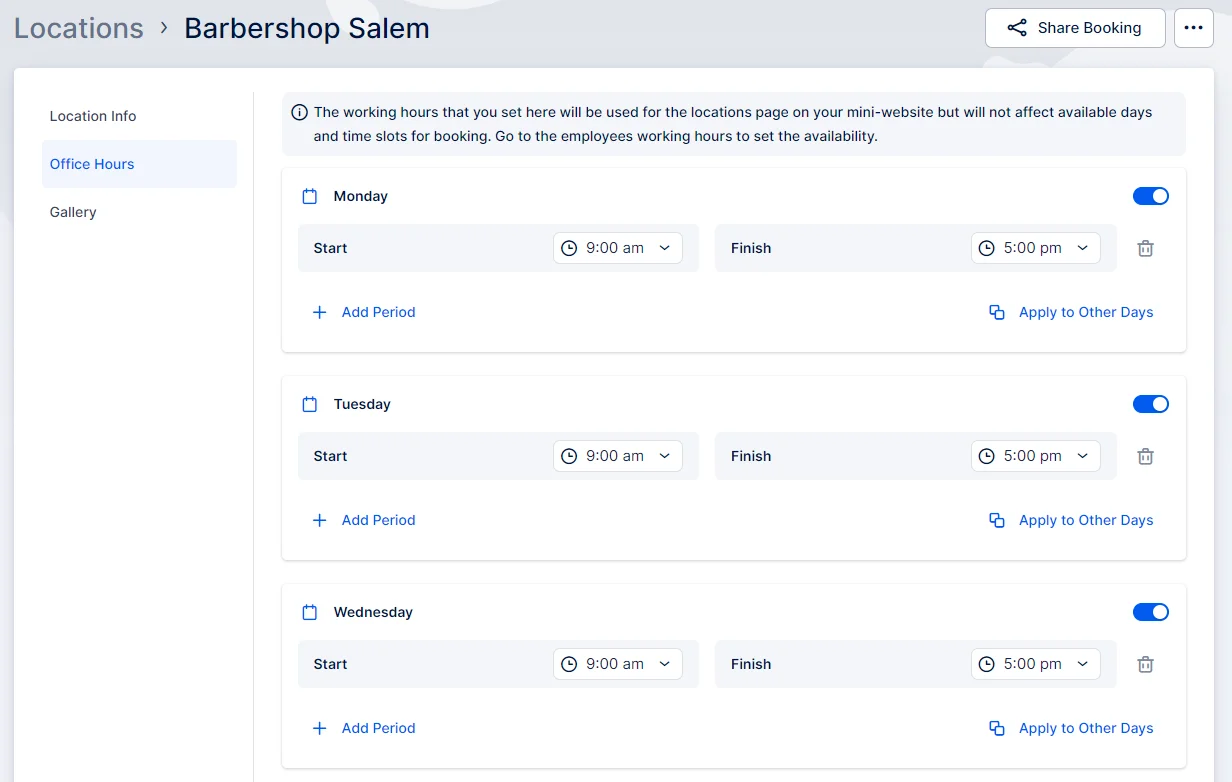
After adding a location, you can further customize it by setting up specific office hours. To do this:
- Navigate to the Locations page and find the location you want to edit.
- Click on the three-dots menu next to the location and select “Edit Location.”
- In the Edit Location window, you’ll find the “Office Hours” section. Here, you can define the specific working hours for that location.
How Office Hours Work:
It’s important to note that currently, these office hours are not used for booking directly. Instead, Quickly Booked App follows a hierarchy when checking for availability:
- First, it checks the individual working hours of the assigned employee.
- Then, it looks at the general working hours defined in the General Settings of Quickly Booked App .
The office hours set for the location serve as information for customers, providing transparency about when the location is typically open for business. Customers can see this information on the booking form as they select their preferred location.
Gallery – Once you edit the Location, you have the option to create a location gallery that showcases images of your location. This gallery will be displayed to customers when they are making a booking and select a specific location.
Uploading Photos:
- Upload one or multiple photos from your computer.
- Customers will see these images when they select the location during their booking process.
- This is a great way to showcase the ambiance, facilities, and atmosphere of your location to potential customers.
- You can upload as many photos as you need to create an attractive and informative gallery.
Tips for Creating a Location Gallery:
- Choose high-quality images that represent your location well but please note that a single image can’t exceed 20 MB in size.
- Include photos of the interior, exterior, amenities, and any other relevant features.
- Show different angles and perspectives to give customers a comprehensive view.

Once you have configured the office hours and uploaded photos for a location in Quickly Booked App, this information will be prominently displayed on your Booking website, on the Locations page.
Please note: Locations will appear during the booking process only if they are connected with employees in the Employee’s Info and Working Hours tabs. Select the default location for each employee and choose locations in each working period to create unique schedules (your employees can cover different locations in their Working Hours section).
Viewing and Managing Locations
All locations that you create will be displayed on the Locations page as a list. Here’s what you’ll see:
- Location List:Basic information such as location name, address, and phone number.Clicking on a specific location opens a sidebar with more details.
- Basic information such as location name, address, and phone number.
- Clicking on a specific location opens a sidebar with more details.
- Sidebar Details:Location office hours.Address displayed on a map.Gallery photos (if created).To edit a location, click on the three dots on the sidebar.
- Location office hours.
- Address displayed on a map.
- Gallery photos (if created).
- To edit a location, click on the three dots on the sidebar.
Search and Options:
- If you have many locations, use the search bar to find specific locations by name.
- Each location has a three-dots menu on the right for editing or deleting.
- Edit: Update location details as needed.
- Delete: Be cautious when deleting. If a location has future or past appointments linked to it, you’ll receive a warning. Deleting a location will remove all associated appointments, past and future.